How to Prime a Keurig: Step-by-Step Guide
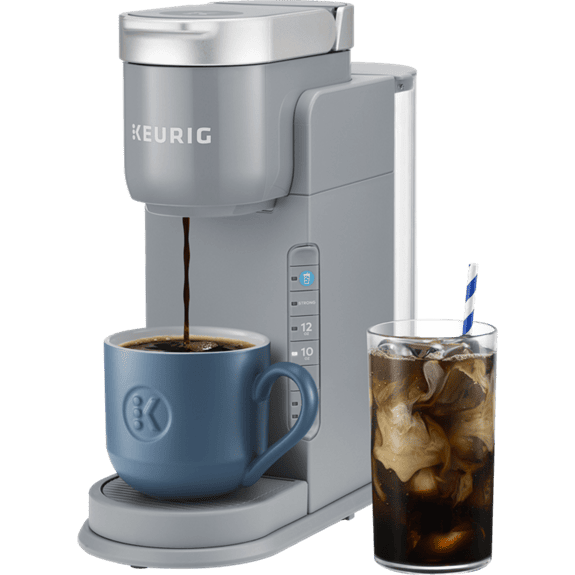
If you’re a coffee lover, you know how important it is to have a reliable coffee maker. Keurig is one of the most popular brands of coffee makers, known for its convenience and ease of use. However, sometimes you may encounter an error message that says “prime” when you try to brew a cup of coffee. This can be frustrating, but don’t worry, we’ve got you covered! In this article, we will guide you through the process of priming your Keurig coffee maker so you can enjoy a fresh cup of coffee in no time.
Before we dive into the steps to prime your Keurig, let’s first understand what priming means. Priming is the process of preparing your coffee maker for use by filling the water lines with water. This ensures that your coffee maker is ready to brew a fresh cup of coffee. If you’re seeing the “prime” error message on your Keurig, it means that the water lines are not fully filled with water. This can happen due to various reasons such as a dirty water reservoir, clogged needles or filter screen, or air bubbles in the water lines. Don’t worry, we will show you how to fix all of these issues in the following paragraphs.
Understanding the Prime Error in a Keurig
If you are a coffee lover, you probably know how frustrating it can be when your Keurig coffee maker displays the “Prime” error message. This error message indicates that your Keurig is failing to dispense water properly. In this section, we will help you understand what the Prime error message means and how to fix it.
What is the Prime Error in a Keurig?
The Prime error message on your Keurig means that the machine needs assistance in getting water flowing properly. This could be because of air trapped in the system or debris obstructing the water pathway. When the Keurig displays the Prime error message, it is unable to brew coffee, and you need to fix the issue to get your machine back up and running.
What Causes the Prime Error Message?
The Keurig Prime error message can be caused by several factors, including:
- A dirty water reservoir
- An out-of-alignment water reservoir
- Debris clogging the needles
- Air trapped in the system
How to Fix the Prime Error Message?
To fix the Prime error message, you need to follow a few simple steps. Here’s what you can do:
- Clean the water reservoir: A dirty water reservoir is one of the most common causes of the Prime error message. You can clean the water reservoir by removing it from the machine and washing it with soap and warm water.
- Align the water reservoir: If the water reservoir is out of alignment, it can cause the Prime error message. You can align the water reservoir by removing it from the machine and reinserting it correctly.
- Unclog the needles: Debris can sometimes clog the needles in the Keurig machine, causing the Prime error message. You can use a paper clip to clean the needles.
- Prime the machine: If the above steps do not work, you can prime the machine manually. To do this, you need to turn off the machine, unplug it, and remove the water reservoir. Then, fill the reservoir with water and reinsert it into the machine. Turn on the machine and let it run until the water starts flowing.
By following these steps, you can fix the Prime error message on your Keurig and enjoy your favorite cup of coffee.
The Importance of Priming a Keurig
As coffee lovers, we all know how important it is to have a properly functioning Keurig machine. One of the most common issues that Keurig users face is the “prime” error. This error occurs when the machine is unable to pump water through the system. To fix this issue, we need to prime the Keurig machine.
Priming a Keurig is a crucial step to ensure optimal performance. It helps to remove any air bubbles or impurities that may have accumulated in the system. By doing so, it allows for better extraction of coffee flavors. This results in a more flavorful and enjoyable cup of coffee.
There are several ways to prime a Keurig machine. One of the simplest ways is to clean the water reservoir. A dirty water reservoir is one of the causes of a “prime” error with Keurig. To clean the reservoir, simply detach it from the machine and clean it thoroughly. Once the reservoir is clean, reattach it to the machine and try brewing again.
Another way to prime a Keurig machine is to run water through the system without a K-cup. This helps to remove any air bubbles or impurities that may have accumulated in the system. To do this, simply fill the water reservoir with water and run the machine without a K-cup. Once the water has run through the system, the machine should be primed and ready to use.
In conclusion, priming a Keurig machine is an essential step to ensure optimal performance. By removing any air bubbles or impurities, it allows for better extraction of coffee flavors. This results in a more flavorful and enjoyable cup of coffee.
Preparation for Priming
Before priming your Keurig coffee maker, it is important to ensure that all necessary preparations have been made. Here are the steps you need to follow:
- Clean the Water Reservoir: One of the most common reasons for a “prime” error on your Keurig machine is a dirty water reservoir. Detach the water reservoir from the machine and clean it thoroughly. You can use a sponge or washcloth to clean the reservoir. Make sure to dry it completely before reattaching it to the machine.
- Fill the Water Reservoir: Once the water reservoir is clean and dry, fill it with fresh water. Make sure to fill the reservoir to the maximum fill line.
- Check the Filter Screen: The filter screen located at the bottom of the water reservoir can become clogged with coffee grounds or other debris. Check the filter screen for any debris and clean it if necessary.
- Replace the Water Filter: If your Keurig coffee maker has a water filter, it is important to replace it regularly. The water filter helps remove impurities from the water, which can affect the taste of your coffee. Follow the manufacturer’s instructions for replacing the water filter.
- Check the K-Cup Holder and Pod Holder: The K-Cup holder and pod holder can become clogged with coffee grounds or other debris. Check these holders for any debris and clean them if necessary.
By following these steps, we can ensure that our Keurig coffee maker is properly prepared for priming.
Step-by-Step Guide to Prime a Keurig
If you are experiencing issues with your Keurig, such as a “prime” error message, it may be time to prime your machine. Priming a Keurig is a simple process that can help ensure your machine is working at its best and producing the best coffee possible. Here is a step-by-step guide to prime a Keurig:
- Turn off and unplug your Keurig. The first step is to fully power down your Keurig. Turn it off and unplug it to avoid any electrical issues.
- Clean the water reservoir. A dirty water reservoir can cause a “prime” error with Keurig. Remove the water reservoir and clean it thoroughly. If there is any debris or clog in the entrance needle, use a paper clip to remove it.
- Check for air bubbles in the water line. Air bubbles in the water line can also cause a “prime” error. To remove air bubbles, turn on your Keurig and let it run for a few seconds without a K-cup. This will help pump water through the system and remove any air bubbles.
- Reassemble the machine. Once you have cleaned the water reservoir and removed any debris from the entrance needle, reassemble the machine. Make sure that the funnel and entrance needle are properly aligned.
- Plug in and turn on your Keurig. Once your Keurig is reassembled, plug it in and turn it on. This will help ensure that the machine is properly primed and ready to use.
By following these simple steps, you can easily prime your Keurig and ensure that it is working at its best. If you continue to experience issues with your machine, consider using a Keurig solution to help clean and maintain your machine.
Cleaning and Maintenance of a Keurig
Maintaining your Keurig coffee maker is essential to ensure that it continues to function optimally. Regular cleaning and maintenance of the machine will not only extend its lifespan but also help keep your coffee tasting fresh and delicious.
Cleaning the Machine
Cleaning the Keurig machine involves removing any residue or build-up that may affect the taste of your coffee. The easiest way to clean the machine is by running a cleansing brew, which involves running a brew cycle without a K-cup. This helps to flush out any debris or residue that may have accumulated in the machine.
Another important area to clean is the needle maintenance area. This is where the needles that puncture the K-cup are located. Over time, these needles can become clogged with coffee grounds, which can affect the water flow and taste of your coffee. To clean the needles, use a paperclip or a needle cleaning tool to remove any debris that may have accumulated.
Descaling the Machine
Descaling the Keurig machine is an important part of maintenance that helps to remove any calcium build-up that may have accumulated in the machine. Calcium build-up can affect the taste of your coffee and also reduce the efficiency of the machine. To descale the machine, use a descaling solution or white vinegar.
To use white vinegar, fill the water reservoir with equal parts of white vinegar and water. Run a brew cycle without a K-cup, and repeat the process until the water reservoir is empty. Finally, run several brew cycles with just water to rinse out any remaining vinegar.
Mesh Screen Filter
The mesh screen filter is an essential component of the Keurig machine that helps to filter out any debris or impurities from the water. Over time, this filter can become clogged with debris, affecting the taste of your coffee and reducing the efficiency of the machine. To clean the mesh screen filter, remove it from the water reservoir and wash it with warm, soapy water.
In conclusion, cleaning and maintaining your Keurig machine is essential to ensure that it continues to function optimally. Regular cleaning and maintenance will not only extend the lifespan of the machine but also help keep your coffee tasting fresh and delicious. By following the simple steps outlined above, you can ensure that your Keurig machine is always in top condition.
Troubleshooting Common Keurig Problems
At times, your Keurig coffee maker may not work as expected. Below, we have listed some of the most common Keurig problems and how to troubleshoot them.
Prime Error Message
One of the most common Keurig problems is the “Prime” error message. This message appears when the machine is not able to pump water through the system. To fix this issue, we recommend cleaning the needle that punctures the K-Cup. You can do this by using a paper clip or toothpick to remove any blockage. Alternatively, you can try cleaning the filter screen and running a few water-only cycles to rinse out the machine.
Blockage in the Inner Tubes
Another common issue is blockage in the inner tubes of the Keurig machine. This can lead to a slow or incomplete brew, or even no brew at all. To fix this, we suggest running a descaling cycle with a 1:1 water and Keurig descaling solution ratio. This will help remove any mineral buildup or debris in the inner tubes.
Troubleshooting and Resetting the Machine
If your Keurig coffee maker is not working as expected, it may be due to a software issue. You can try resetting the machine by unplugging it and plugging it back in after a few minutes. Additionally, you can try troubleshooting the machine by referring to the user manual or contacting customer support.
Warranty and Customer Service
If your Keurig coffee maker is still not working after troubleshooting, it may be covered under warranty. We recommend contacting customer service or visiting the Keurig website to learn more about your warranty and customer support options.
In conclusion, Keurig coffee makers are reliable machines that can last for years with proper maintenance. By following the troubleshooting tips above, you can ensure that your Keurig machine works as expected and delivers a delicious cup of coffee every time.
Ensuring Optimal Coffee Brewing
When it comes to brewing coffee with a Keurig machine, ensuring optimal performance is key to getting a delicious cup of coffee every time. Here are a few tips on how to prime a Keurig machine and ensure that your coffee brewing process is as smooth as possible.
Clean the Water Reservoir
One of the most common causes of a “prime” error with a Keurig machine is a dirty water reservoir. To clean the water reservoir, remove it from the machine and wash it with soapy water. Be sure to rinse it thoroughly and dry it completely before reinserting it into the machine.
Use a Water Filter
Using a water filter can help prevent buildup in the machine and improve the flavor of your coffee. Keurig offers a variety of water filter options that are easy to install and replace.
Use the Water-Only Brew Cycle
To ensure that your coffee tastes its best, run a water-only brew cycle before brewing your coffee. This will help flush out any residual flavors from previous brews and ensure that your coffee tastes fresh and delicious.
Use Fresh Coffee Grounds
Using fresh coffee grounds can make a big difference in the flavor of your coffee. Be sure to use coffee grounds that are within their expiration date and store them in an airtight container to maintain their freshness.
By following these simple tips, you can ensure that your Keurig machine is primed and ready to brew a delicious cup of coffee every time.
