Stove Top Percolator Coffee: Brewing Guide

I've always found the process of brewing coffee with a stove top percolator to be a soothing ritual, filled with anticipation as the aroma wafts through the kitchen. The methodical steps involved in crafting a perfect cup of percolator coffee can be quite rewarding, leading to a beverage that's rich and full-bodied. However, there's a pivotal element that often gets overlooked, one that can make or break your coffee experience. Let's explore this essential factor that impacts the final flavor profile and elevates your coffee game to new heights.
Benefits of Using Stove Top Percolator
Why should you consider using a stove top percolator for your coffee brewing needs?
Stove top percolators offer an unparalleled coffee experience. The method of brewing in a percolator on the stove allows for higher temperatures than electric models, which enhances the flavor profile of your coffee.
There's a certain satisfaction in hearing the gentle bubbling and knowing that your coffee is brewing to perfection. The simplicity of cleaning a stove top percolator adds to the appeal – no complicated parts or hidden compartments.
Additionally, these percolators are less prone to clogging from mineral deposits in tap water, ensuring a consistent brew every time. The durability and cost-effectiveness of stove top percolators make them a smart investment for any coffee lover.
The unique taste and experience that comes with brewing coffee in a percolator is unmatched, making it a must-have for those who crave freedom in their coffee brewing routine.
Selecting the Right Coffee Grounds
When selecting the right coffee grounds for your stove top percolator, always opt for a medium to coarse grind to guarantee a flavorful and smooth brewing experience. Using fresh, whole beans and grinding them just before brewing is key to preserving the rich aroma and taste of your coffee.
Coarser grounds are ideal for percolators as they prevent over-extraction, ensuring your coffee doesn't end up with a harsh or bitter flavor. Additionally, avoiding finely ground coffee is essential to prevent a gritty texture in your brewed cup.
Water Measurement and Preparation
For precise and flavorful coffee brewing in a stove top percolator, I always make sure to accurately measure the water using the marked lines within the percolator. It's important to keep the water level below the fill line to prevent any potential overflow during the brewing process. Adjusting the water amount based on the desired number of cups of coffee you want to brew is fundamental for getting that perfect balance of strength and flavor.
When measuring the water, I recommend using cold, filtered water. This not only contributes to a better taste but also helps prevent mineral build-up in the percolator, ensuring its longevity and peak performance. The water you use sets the foundation for the entire brewing process, so paying attention to this detail is key to achieving a delicious cup of coffee every time.
Assembling the Percolator Components
Now, let's put together the various components of the percolator to kickstart the brewing process for that perfect cup of coffee. Assembling the percolator is an exciting step towards crafting a delightful brew. Here's how to do it:
- Reservoir: Fill the reservoir with water, ensuring you pour the right amount for the desired strength of coffee.
- Basket: Place the coffee grounds into the basket, making sure to level them for even extraction.
- Lid: Secure the basket lid on top, ensuring it fits snugly to prevent any grounds from escaping during percolation.
- Stem: Insert the stem into the percolator, ensuring it's properly aligned with the basket for efficient brewing.
- Handle: Attach the handle securely to the percolator, ensuring a safe and stable grip for handling.
Each component plays an important role in the percolation process, contributing to the rich flavor and aroma of your coffee. By assembling the percolator correctly, you set the stage for a truly satisfying brewing experience.
Heating and Monitoring the Percolation
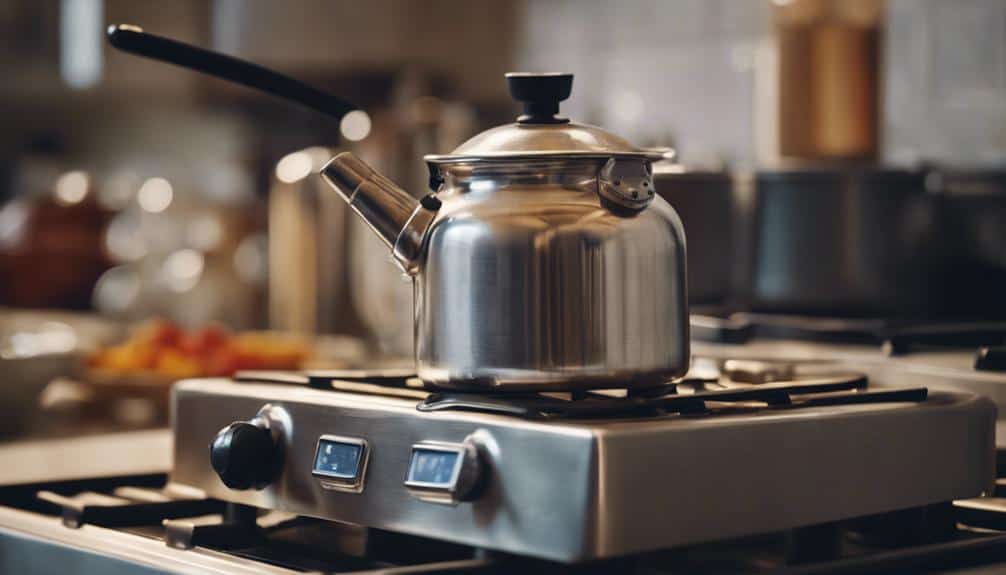
By carefully heating and closely monitoring the percolator, you can guarantee a precise and flavorful brewing process that tantalizes the senses. The key to success lies in heating the percolator slowly over low heat. This gradual approach prevents boiling, ensuring the coffee percolates at the perfect pace. As the water heats up, keep a watchful eye on the glass globe. Observing the percolation process visually allows you to see when the bubbles start rising through the knob, indicating that the coffee is brewing beautifully.
To maintain this delicate balance, it's essential to set a timer for 8-10 minutes once the percolation begins. While the coffee brews, monitor the bubbles closely. Adjust the heat if necessary to prevent overheating, which could compromise the flavor. As the timer nears completion, be ready to remove the percolator promptly from the heat source. This step prevents over-extraction, preserving the rich and robust essence of your freshly brewed coffee.
Pouring and Serving the Coffee
When it comes to pouring percolator coffee, the key is to do it slowly to prevent any unwanted grounds from making their way into your cup. Using a fine-mesh strainer can help catch any stray grounds that manage to slip through.
Pouring Techniques
To pour a perfect cup of percolator coffee, tilt the pot slightly to prevent grounds or sediment from ending up in your mug. Here are some tips for mastering the art of pouring percolator coffee:
- Tilt the pot gently to avoid disturbing the settled grounds.
- Pour the coffee slowly and steadily to maintain control over the flow.
- Consider using a fine mesh strainer to catch any stray grounds that may have slipped through.
- Allow the brewed coffee a moment to rest before serving to let the flavors develop fully.
- Customize your coffee by adding sugar, cream, or flavored syrups to suit your taste preferences.
Enjoy the freedom to create your perfect cup of percolator coffee!
Serving Etiquette
Exhibiting grace and precision, the art of serving percolator coffee entails a delicate balance of control and consideration for the beverage's nuances. When it comes to pouring, tilting the spout of the percolator slightly is key to controlling the flow and preventing spills. Serve this rich brew slowly to avoid disturbing any settled grounds at the bottom of the pot. To guarantee a smooth pour, use a fine mesh strainer to catch any stray grounds. Allow your guests the freedom to customize their coffee by offering sugar, cream, or flavorings. Lastly, provide a selection of mugs or cups for serving, allowing each guest to pick their preferred vessel for savoring every sip.
| Serving Etiquette Tips | |
|---|---|
| Tilt spout while pouring | Serve slowly |
| Use a fine mesh strainer | Allow customization |
| Offer variety of serving cups | – |
Enjoying the Aroma
Indulge in the rich aroma of freshly brewed percolator coffee as it fills the room, inviting you to savor each nuanced sip.
- Pour the steaming coffee into your favorite cup, letting the warmth envelop your senses.
- Make sure to avoid pouring in the grounds, ensuring a smooth and delightful experience with every sip.
- Take a moment to appreciate the deep flavors and unique brewing process that went into making this cup of coffee.
- Consider personalizing your coffee by adding sugar, cream, or any other desired additions to elevate its taste to your liking.
- Sip slowly and relish in the nostalgia that comes with each cup of this freshly brewed percolator coffee.
Enhancing Flavor With Additions
I can't wait to share how flavorful spice infusions, sweetened cream options, and nutty flavor complements can take your percolator coffee to the next level.
These additions not only enhance the taste but also provide a unique and personalized touch to your brew.
Get ready to elevate your coffee experience with these exciting flavor-enhancing options.
Flavorful Spice Infusions
Enhancing your coffee's flavor profile with warm and aromatic spice infusions can elevate your brewing experience to new heights. When experimenting with flavoring your coffee grounds for stovetop percolator coffee, consider these options:
- Cinnamon: Adds a warm, spicy kick to your brew.
- Nutmeg: Introduces a subtle, earthy sweetness.
- Cardamom: Offers a unique, floral flavor profile when cracked open and added to the grounds.
- Vanilla extract: Introduces a smooth, sweet undertone to your coffee.
- Cloves: Adds a rich, aromatic twist to your morning cup.
Each spice infusion brings its own character, enhancing the natural flavors of the coffee. Embrace the freedom to create a personalized and flavorful cup of coffee that suits your taste preferences.
Sweetened Cream Options
Exploring sweetened cream options for your stovetop percolator coffee can add a delightful touch of flavor and richness to your brewing experience. Sweetened cream enhances the inherent robustness of percolator coffee, offering a perfect balance of sweetness and creaminess.
Opting for flavored creamers opens a world of possibilities, introducing layers of complexity and depth to your cup of joe. Non-dairy creamers are a fantastic alternative for those avoiding dairy, providing a velvety texture without guaranteeing on taste.
Nutty Flavor Complements
Delving into the world of nutty flavor complements can elevate your stovetop percolator coffee brewing experience to new heights of richness and complexity. Here are some exciting additions to enhance your coffee:
- Cinnamon: Adding a dash can amplify the nutty profile of your percolator coffee.
- Almond Milk: Complements the nuttiness without being overpowering.
- Hazelnut Syrup or Extract: Intensifies the nutty notes in the brew.
- Nut-Based Creamers: Experiment with different types for layered flavors.
- Toasted Almond or Walnut Sprinkles: Provide a crunchy texture and extra nuttiness on top of your coffee.
These additions will surely tantalize your taste buds and enrich your coffee experience with a delightful nutty twist.
Cleaning and Maintenance Tips
To uphold your stovetop percolator brewing delicious coffee consistently, regular cleaning and maintenance are essential for peak performance and flavor preservation.
Cleaning a stovetop percolator is a breeze compared to electric coffee makers thanks to its simple disassembly and dishwasher-safe parts. A quick wash with soap and water on a sponge after each use helps guarantee residue build-up prevention and ensures your coffee maintains its delicious flavor profile.
The convenience of dishwasher-safe parts means you can skip the vinegar cleaning routine required for electric models, making maintenance hassle-free. Deep cleaning in the dishwasher every so often, coupled with regular soap and water cleaning in between, will keep your percolator in top shape.
Stovetop percolators aren't only durable and long-lasting but also a cost-effective choice when compared to their electric counterparts. By maintaining and cleaning your percolator regularly, you make sure that each brew is as flavorful and satisfying as the last.
Conclusion
Brewing coffee with a stove top percolator is a rewarding experience that allows for full control over the brewing process.
From selecting the perfect coffee grounds to assembling the percolator with precision, every step contributes to a rich and flavorful cup of coffee.
By adding personal touches and maintaining the percolator properly, you can enjoy delicious coffee for years to come.
Embrace the tradition and savor the taste of stove top percolator coffee!